How to setup and use a Docker MacVLAN network on a Synology
I was searching a solution to expose services like Pi-hole or AdGuard directly on my network. Macvlan'ed was the solution to have a unique IP, but also to be routable from the NAS.
Description of the MacVLAN
Macvlan, MACVLAN or MAC-VLAN allows you to configure multiple Layer 2 (i.e. Ethernet MAC) addresses on a single physical interface. Macvlan allows you to configure sub-interfaces (also termed slave devices) of a parent, physical Ethernet interface (also termed upper device), each with its own unique (randomly generated) MAC address, and consequently its own IP address. Applications, VMs and containers can then bind to a specific sub-interface to connect directly to the physical network, using their own MAC and IP address.
Host Networking
SSH to your Syno Nas and run the following command:
$ ip link show
This displays all the IP links on your NAS. If, like me, you’ve made changes and tweaks over the years and forgotten all about them, you’ll see interfaces and configurations that will spark memories of happier times. Here’s the current output below:

(1) loopback
(2) sit0 for ipv6 — ipv4 tunneling
(3–6) physical NICs
(7–15) Virtual switch LAN ports
35, 51, 85 docker, macvlan and a vpn connection
What’s important here, is that when you create a macvlan switch, you need to understand *which* physical adapter to connect it to. For example if you run
$ ip link add macvlan0 link eth0 type macvlan mode bridge
This can fail. Why? Probably because you have Synology Virtual Machine manager installed, and within *its* networking configuration, you have Virtual Network 0 attached to eth0 for example.
⟹ with Synology Virtual Machine your interfaces became ovs_ethX
If you have any networking bonding on your physical NICs, this will show up as bond-system, bond0, etc. and again, when you try to create a Docker macvlan, it will fail unless you connect it to the right interface.
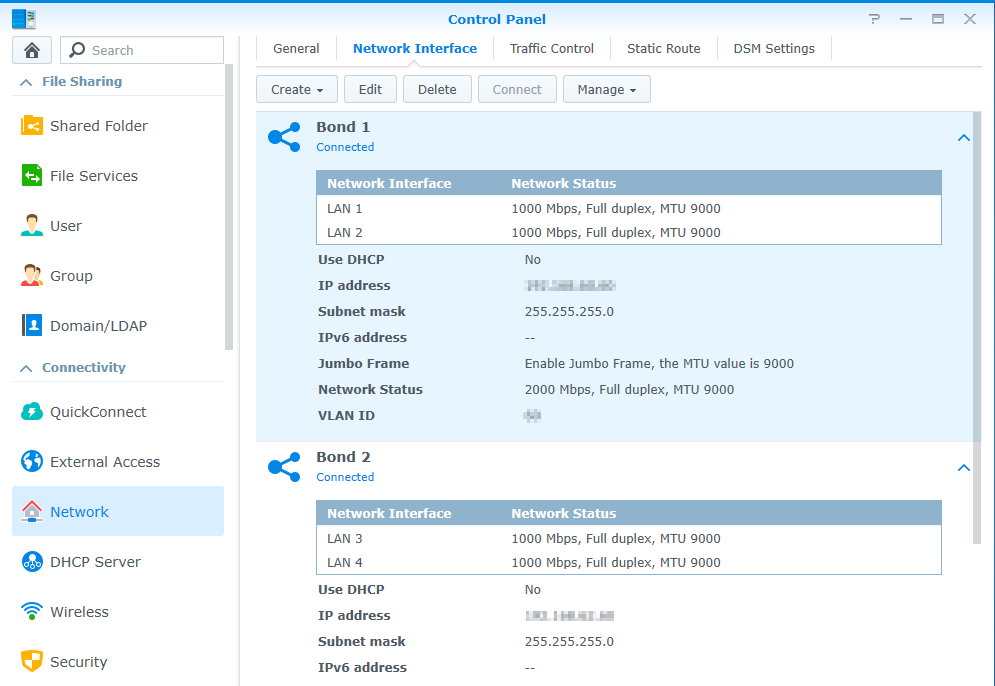
⟹ with network bonding your interfaces became bond-system, bond0, etc
And finally, with a combination of the two, you can also finish with something like ovs_bond0 !
How to setup MacVLAN network
Creating the MacVLAN on the host
This little script was made to create your MacVLAN network on the host
#!/bin/bash

# Set timeout to wait host network is up and running

sleep 60

# Host macvlan bridge recreate

ip link add macvlan-br0 link bond0 type macvlan mode bridge
ip addr add 192.168.0.209/32 dev macvlan-br0
ip link set dev macvlan-br0 address 22:cd:fc:ee:eb:6f
ip link set macvlan-br0 up
ip route add 192.168.0.208/28 dev macvlan-br0
So there, you need to adapt the parent interface (here bond0) and your network subnet, finally change the route.
In the beginning of the script, a pause is added to use it as a scheduled task in the Synology :
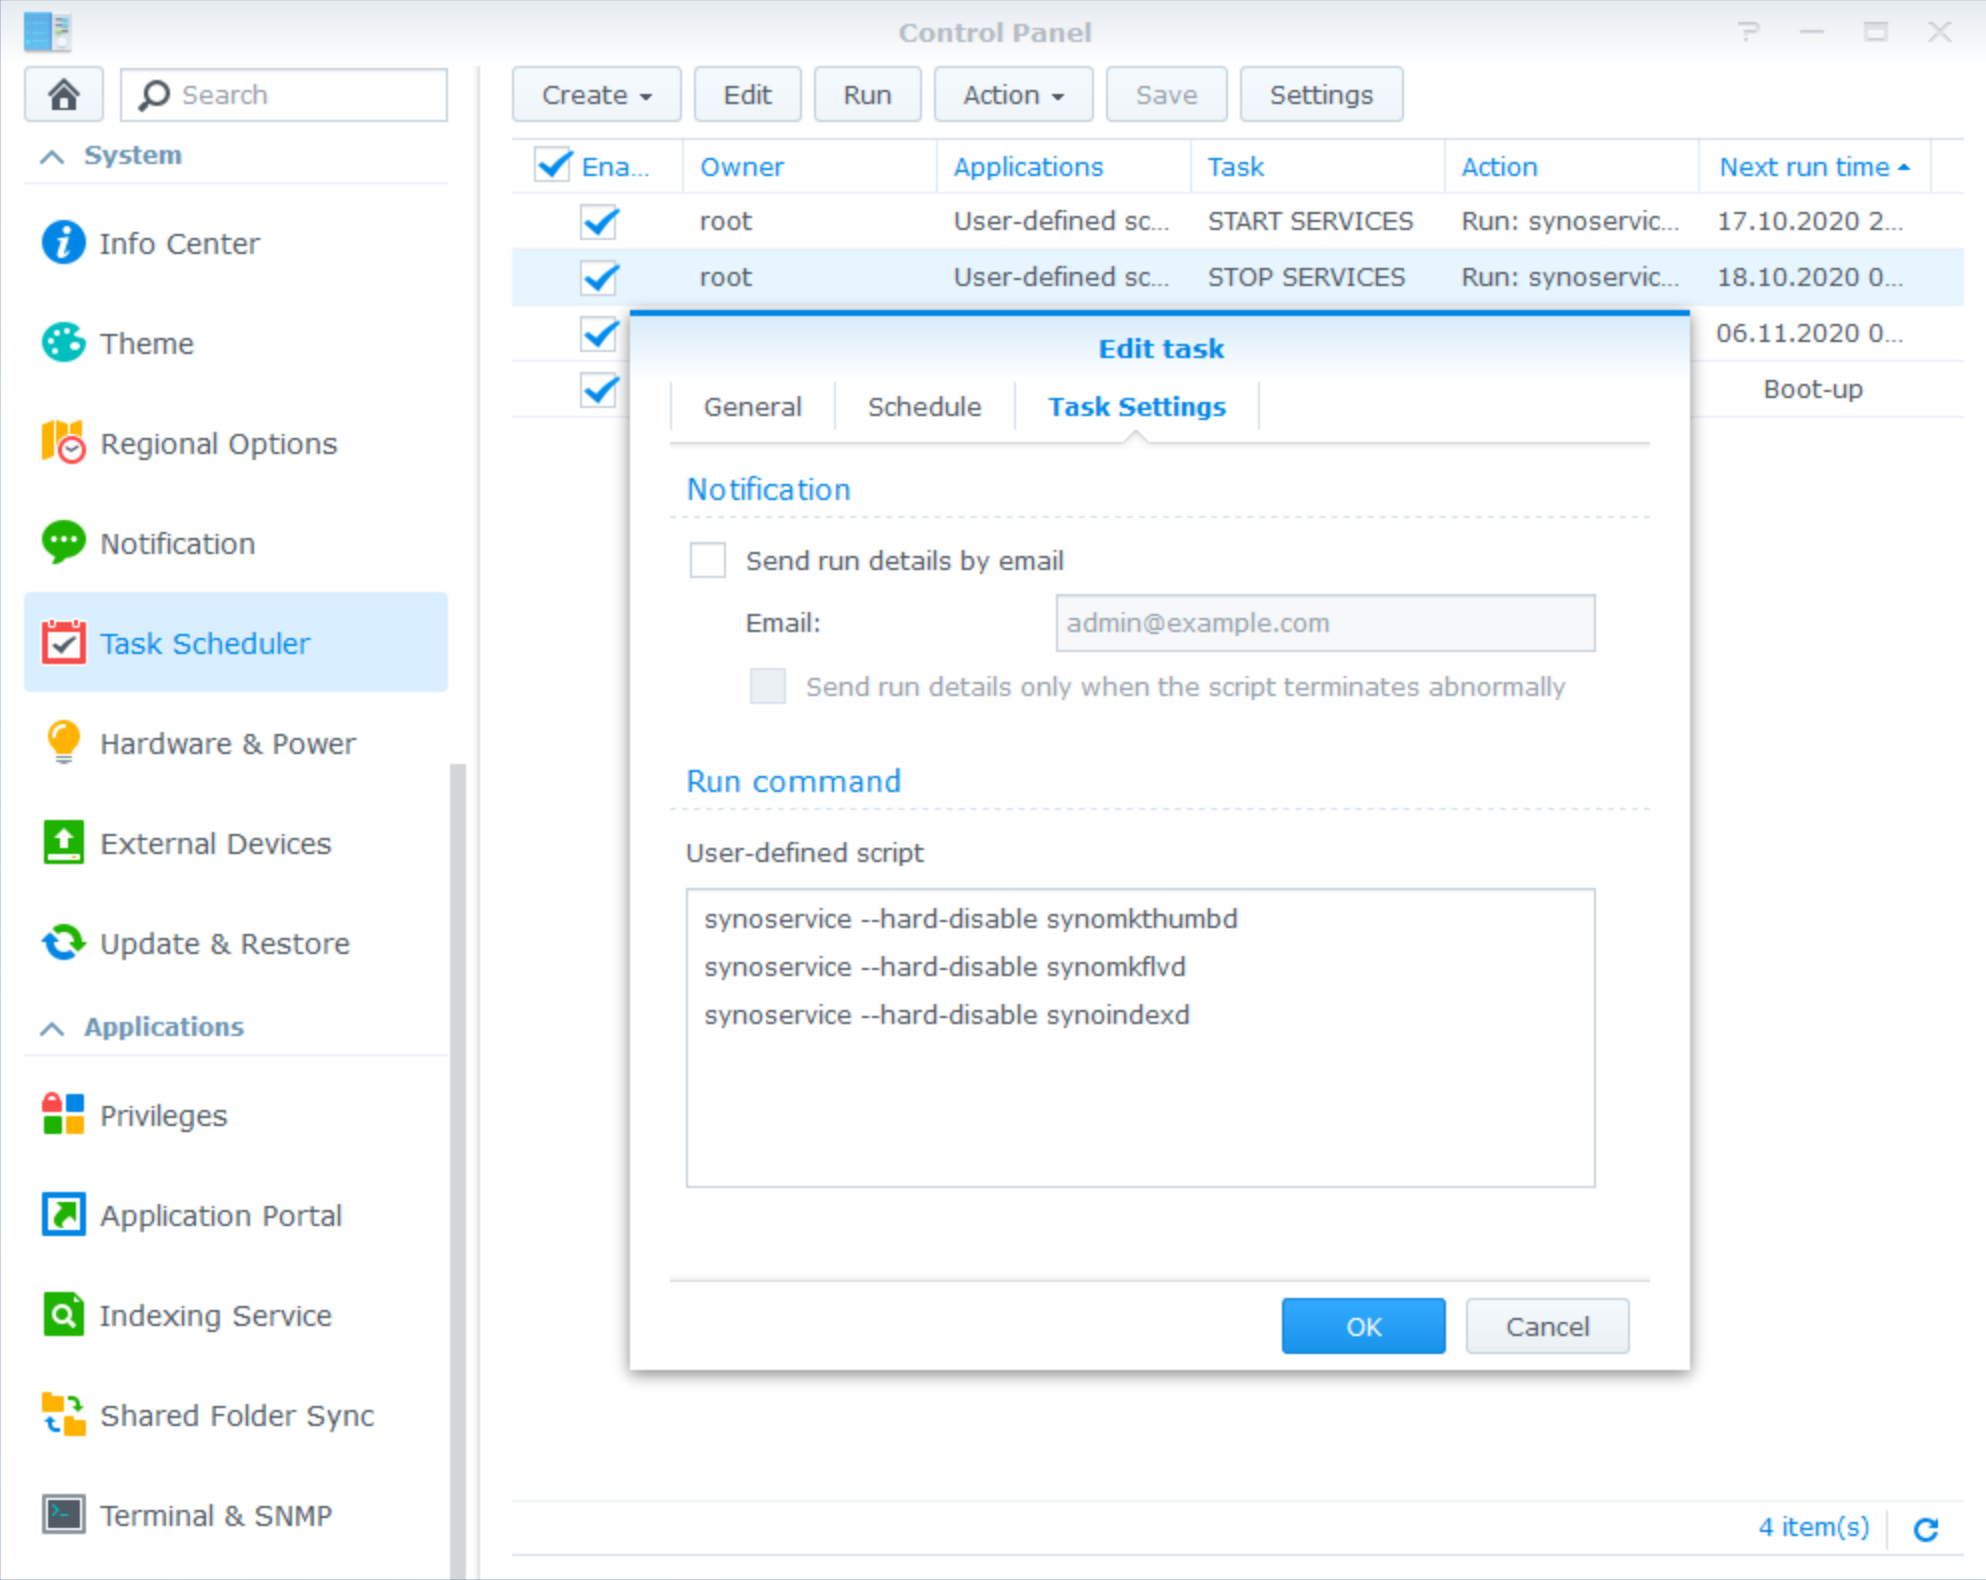
Run it as root at the boot-up of the Synology to restore your parameters on each restart.
Creating the MacVLAN network for Docker
Now, we need to inform docker of the new network we made available. This is a unique operation :
docker network create -d macvlan \
  --subnet=192.168.0.0/24 \
  --gateway=192.168.0.3 \
  --ip-range=192.168.0.208/28 \
  --aux-address 'host=192.168.0.101' \
  -o parent=ovs_bond0 macvlan-br0
This network need to reflect the previous settings used to create the MacVLAN before, so please adapt these settings with what you set previously on your system.
Use MacVLAN in a Docker compose
Finally, this is a little example how to use the new network in a docker-compose, here to start a AdGuard
version: '2'

services:
  adguard:
    container_name: AdGuard
    domainname: domain.io
    hostname: adguard
    image: adguard/adguardhome:latest
    mac_address: d0:ca:ab:cd:ef:02
    cap_add:
      - NET_ADMIN
    networks:
      default:
        ipv4_address: 192.168.0.210
    dns:
      - 127.0.0.1
      - 9.9.9.9
    ports:
      - 53/tcp
      - 53/udp
      - 443/tcp
      - 784/udp
      - 853/tcp
      - 3000/tcp
      - 5443/tcp
      - 5443/udp
    restart: unless-stopped
    volumes:
      - /volume1/docker/adguard/work:/opt/adguardhome/work
      - /volume1/docker/adguard/conf:/opt/adguardhome/conf
      - /volume1/docker/adguard/certs:/opt/adguardhome/certs:ro
    environment:
      - ServerIP=192.168.0.210
      - PROXY_LOCATION=adguard
      - VIRTUAL_HOST=adguard.domain.io
      - LETSENCRYPT_HOST=adguard.domain.io
      - VIRTUAL_PORT=80
      - TZ=Europe/Brussels

networks:
  default:
    external:
      name: macvlan-br0
Start it and your brand-new AdGuard is running on 192.168.0.210, last step is to put this IP as DNS server in your dhcp leases. The interesting parts is the network's one, you can reuse this for any service like an Unifi-Controller.

 Admin
Admin 
 Admin
Admin